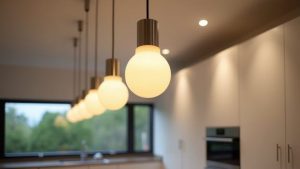

To safely remove a fluorescent kitchen light box, start by preparing the area and shutting off power. Next, remove diffuser panels and bulbs carefully. Detach the light box by unscrewing it from the ceiling and cutting around edges if needed. Proceed with electrical disconnection, identifying wire colors to ensure correct handling. Finally, clean up the workspace, inspect for any ceiling damage, and dispose of materials properly. More detailed steps are available for a thorough understanding.
Key Takeaways
- Prepare the area by moving furniture and protecting the floor with drop cloths, and shut off power at the circuit breaker.
- Remove diffuser panels and bulbs carefully, wearing gloves and ensuring the power is off.
- Detach the light box by unscrewing fasteners and any supporting T-bar systems, with assistance for safety.
- Disconnect electrical wiring safely by identifying wire colors and ensuring power remains off during the process.
- Perform a thorough cleanup, checking for ceiling damage and disposing of materials containing mercury responsibly.
Preparation for Removal

Before proceeding with the removal of a fluorescent kitchen light box, it is essential to prepare the workspace effectively. This involves organizing the area and establishing safety protocols.
First, move furniture, rugs, and appliances away from the work zone, ensuring clear walkways for safe access. Lay down drop cloths to protect the floor and gather cleaning supplies for any dust or debris cleanup.
Next, shut off power at the circuit breaker and verify disconnection with a non-contact voltage tester. Inform household members about the ongoing electrical work. The removal process of the T-bar system requires handling a metal T-bar system that is light and easy to manage.
Assemble necessary tools, including screwdrivers and a ladder. Lastly, inspect the fixture and surrounding ceiling for any damage, marking key areas for guidance during removal. Be aware that fluorescent fixtures, which were common in houses built in the late 80s and early 90s, are often outdated and may require additional attention during removal.
Preparing diligently can enhance safety and efficiency throughout the process.
Removing Diffuser Panels and Bulbs

Removing the diffuser panels and bulbs from a fluorescent kitchen light box requires a systematic approach to ensure safety and efficiency.
First, it is essential to turn off the power to the fixture at the circuit breaker. Depending on the diffuser types—such as drop ceiling, edge-grip, or hinged diffusers—the removal method may differ. For instance, some require gentle wiggling, while others might involve pressing levers.
Turning off the power at the circuit breaker is crucial before removing diffuser panels, as their designs dictate different removal techniques.
Wearing protective gloves will prevent cuts and keep oils off the panels. Once the panels are removed, gently twist the bulbs counterclockwise to release them.
Inspect sockets for wear and replace any broken bulbs carefully, ensuring a snug fit before proceeding. Taking these safety tips into account will streamline the process.
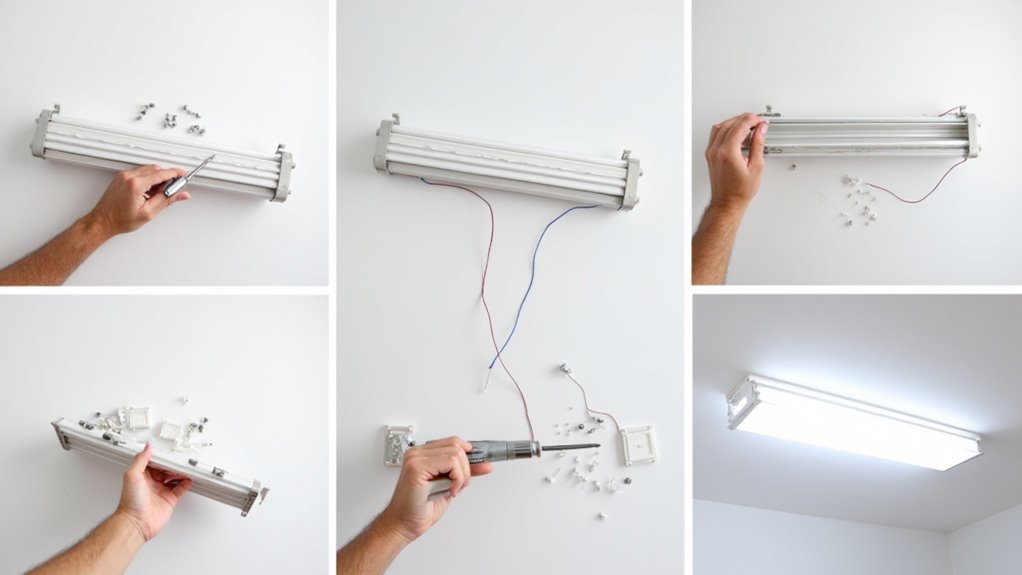
Detaching the Fluorescent Light Box

Detaching the fluorescent light box involves a careful and methodical process to ensure safety and avoid damage.
First, one should locate and remove the mounting screws or fasteners securing the light box installation to the ceiling. If any additional metal framing or T-bar systems support the fixture, these must also be detached.
Using a utility knife, scoring around the edges helps prevent ceiling damage. As the fixture weight can be significant, having an assistant is advisable during the removal.
Once unscrewed, gently lower the light box, ensuring no wires are caught. It is crucial to keep all fasteners organized for potential reuse, maintaining a clean workspace throughout the detachment process. Additionally, ensure that all power is turned off at the breaker before beginning to avoid electric shocks.
Electrical Disconnection

To ensure a safe and effective electrical disconnection of the fluorescent light fixture, it is imperative to begin with a complete power shutdown at the main circuit breaker, rather than relying solely on the wall switch. This step is crucial for safety precautions.
For a safe disconnection of your fluorescent light fixture, always shut off power at the main circuit breaker first.
After confirming the absence of electrical current with a voltage detector, the next task involves handling the wiring connections according to their colors: hot (black or red), neutral (white), and ground (green or bare copper).
- Inform household members about the power shutdown.
- Use insulated gloves and tools.
- Label or photograph connections for future reference.
- Verify all wires are capped off before removing the fixture.
Such measures ensure both safety and compliance during disconnection.
Cleanup and Inspection

After completing the disconnection of the fluorescent light fixture, thorough cleanup and inspection are essential to ensure a safe and tidy environment.
A detailed cleanup checklist should be followed to clear debris, dust, and dirt. Protective drop cloths must be used to contain mess and safeguard the flooring.
Key inspection techniques involve checking for ceiling damage, ensuring wiring is secure, and identifying studs for future mounting.
During the post-removal cleanup, vacuuming and wiping surfaces will help eliminate residual dust.
Final inspections encompass evaluating the area for any necessary repairs or damage and planning for the installation of new fixtures.
Proper disposal of materials containing mercury must also be arranged according to local regulations to ensure safety.